
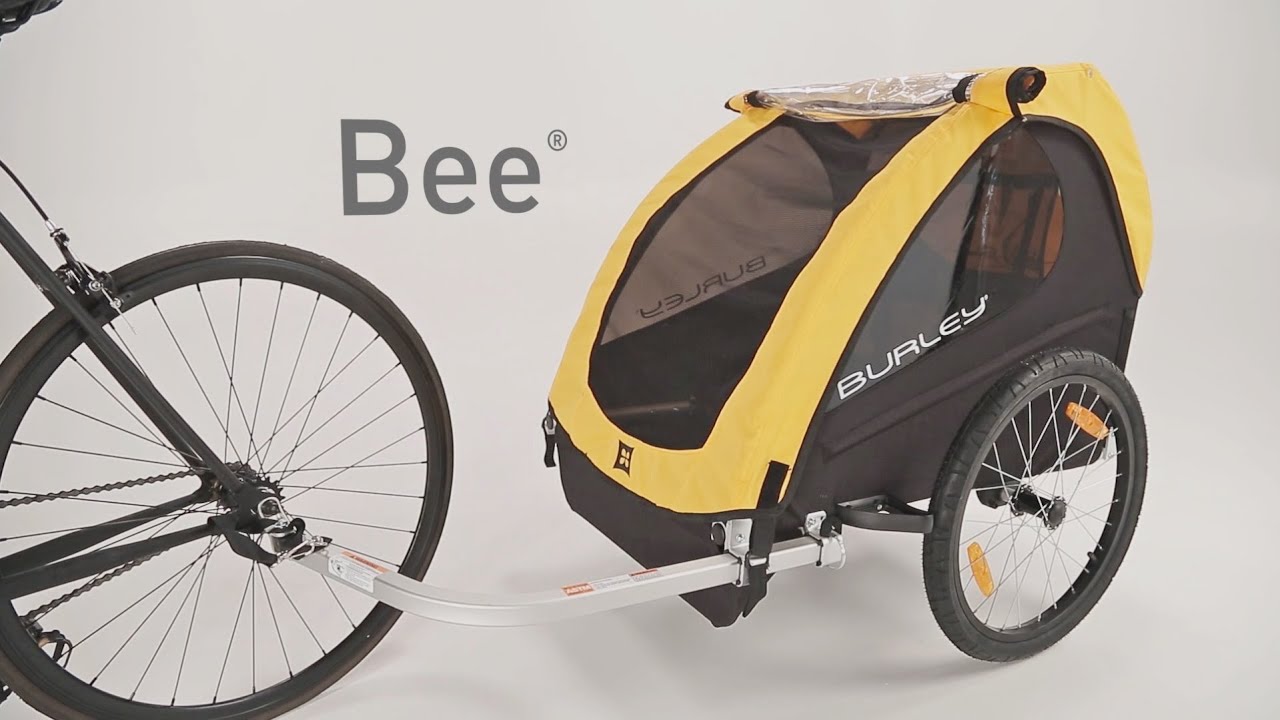
How to attach burley bee bike trailer? To attach a Burley Bee bike trailer, align the trailer’s hitch connector with your bike’s rear axle and secure it using the provided lock pin. Ensure the safety strap is wrapped around the bike frame and connected to the trailer.
Exploring the outdoors with children has never been easier than with the Burley Bee bike trailer, a popular option for active parents. This article provides essential tips for attaching the Burley Bee quickly and securely, ensuring you’re ready to hit the road with minimal fuss.
Crafted for versatility and user-friendliness, the Burley Bee emphasizes safety with a foolproof attachment system that works with most bicycles. Its durability and ease of use make the Burley Bee an excellent investment for family adventures. Keep the process smooth and safe, by following these straightforward steps to successful attachment, and you’ll be cycling with your little ones in no time.
Getting Familiar With The Burley Bee Bike Trailer
Embarking on outdoor adventures with your little ones can be transformative, especially when incorporating the versatility and convenience of a bike trailer. The Burley Bee stands out as a top-tier choice, trusted by cycling enthusiasts and family adventurers alike.
This introductory guide is designed to help you become acquainted with your new Burley Bee Bike Trailer, ensuring that you are ready to hit the trails or the urban landscape with confidence and ease.
Unboxing The Burley Bee Bike Trailer
The first step involves unboxing your new trailer and getting to grips with its parts and accessories. As you open the box, lay out the components on a clean surface to ensure all parts are accounted for and unscathed. You should find the main trailer structure, wheels, towing hitch, safety flag, and user manual.
- Main trailer structure – This is the heart of your trailer, where your little ones will be seated.
- Wheels – Two side wheels that will get you rolling on your journey.
- Towing hitch – Essential for attaching the trailer to your bike.
- Safety flag – Provides visibility for the trailer.
- User manual – Your go-to guide for installation, use, and safety.
Understanding The Component Parts
Acquainting yourself with the component parts of your Burley Bee Bike Trailer is crucial for a safe and enjoyable experience. Here’s a breakdown of the essential parts:
| Part | Description | Function |
|---|---|---|
| Main Cabin | The enclosed area where children sit. | Ensures comfort and protection for passengers. |
| Frame | The sturdy skeleton of the trailer. | Provides structural integrity and support. |
| Hitch arm | The arm extending from the main cabin to the bike. | Facilitates the attachment to the bike. |
| Connection Points | Areas where the hitch arm meets the bike. | Secures the trailer to the bike safely. |
| Wheels | Durable tires mounted on the sides of the trailer | Enable smooth movement and stability. |
| Safety Harness | Adjustable straps within the cabin. | Keeps children secure during transport. |
Your detailed user manual provides specific instructions for the assembly process and guidance on how to properly maintain each part of your Burley Bee Bike Trailer.
Before beginning your first adventure, familiarize yourself with these components and follow the step-by-step assembly guide to avoid any hiccups.
Choosing The Right Bike For Attaching The Burley Bee Bike Trailer
Preparing for outdoor adventures with little ones can be a breeze with the reliable Burley Bee Bike Trailer. To ensure a seamless and safe setup, it is crucial to start with the right type of bicycle.
Compatibility is key when it comes to hitching these two together. This section will guide you through the process of selecting a bike that will fit perfectly with your Burley Bee Bike Trailer.
Bike Compatibility and Requirements
Bike Compatibility And Requirements
Determining if your bike is compatible with the Burley Bee is the first step toward an exciting journey on the road. Below are essential factors to consider:
- Frame Material and Design: Most aluminum, steel, and alloy frames work well, but ensure the frame is sturdy enough to handle the trailer’s weight.
- Rear Axle Type: The bike should have a standard quick-release or nutted axle for attaching the trailer’s flex connector.
- Brake Type: Trailers are generally compatible with both rim brakes and disc brakes, but it’s best to check clearance for hitch installation.
- Wheel Size: Suitable wheel diameters typically range from 26 to 29 inches to ensure a level ride for passengers.
Make sure to assess the specific requirements provided by Burley for their Bee model before proceeding.
Ensuring Proper Attachment Points
Ensuring Proper Attachment Points
The attachment points are where the bike and trailer will connect, making them integral to assembly. These key points are:
- Locate the rear axle of your bicycle as it’s the primary connection point for the trailer’s hitch.
- Check the rear dropouts where the axle meets the bike frame to ensure they are accessible for the hitch attachment.
- Inspect for additional components such as racks or fenders that could obstruct the hitch and require adjustments or removal.
The proper alignment and security of these attachment points cannot be overemphasized. Each connection point should be firm and without any movement post-attachment to guarantee the safety of the trailer’s occupants.
Steps To Attach Burley Bee Bike Trailer
Welcome to your step-by-step guide on attaching the Burley Bee Bike Trailer. Whether you’re gearing up for a family adventure or preparing for a solo outing with extra gear, ensuring your trailer is properly attached is crucial for a safe and enjoyable ride.
We’ll walk you through each phase of the setup journey – from inspecting the trailer hitch and coupler to securing the trailer – and underscore the importance of the safety flag and reflectors.
Inspecting The Trailer Hitch And Coupler
Before you start, take a moment to inspect the trailer hitch and coupler. It’s important that these components are in good shape to guarantee a secure connection. Look for any signs of wear, such as cracks or significant rust. If anything looks amiss, consider replacing parts before continuing.
- Examine the hitch for strength integrity.
- Check the coupler to ensure it’s free of damage.
- Ensure the hitch pin is present and in good condition.
Securing The Trailer Hitch To The Bike
Once you’re sure that the hitch and coupler are in good condition, it’s time to secure the trailer hitch to your bike. Begin by attaching the flex connector to the bike’s rear axle. This can vary slightly depending on your bike model, so refer to your Burley Bee’s manual for specific instructions.
- Turn off the bike and ensure it’s stable.
- Align the flex connector with the rear axle.
- Insert the safety pin through the connector and axle.
- Fasten the hitch securement pin or lock.
- Tug on the trailer slightly to ensure the hitch is firmly attached.
It’s critical that the hitch is properly secured to prevent the trailer from detaching while riding.
Attaching Safety Flag And Reflectors
Safety should never be overlooked. Attaching your safety flag and reflectors is an essential step to enhance visibility and signal your presence to other road users.
| Accessory | Attachment Method |
|---|---|
| Safety Flag | Insert into the designated holder on the trailer frame. |
| Reflectors | Press firmly onto the trailer’s front and rear designated areas. |
All set! With the safety flag waving high and reflectors in place, you’re now ready to hit the road with visibility on your side.
Credit: m.youtube.com
How do you pop up a Burley bike trailer?
Popping up or setting up a Burley bike trailer involves a few straightforward steps. Burley bike trailers are designed for easy assembly and disassembly to facilitate transport and storage. Here’s a general guide on how to set up a Burley bike trailer:
- Unfold the Frame: Start by removing the trailer from its storage bag or position. Unfold the main frame of the trailer. There might be latches or locks that you need to release before you can unfold the frame. Ensure that these latches or locks are securely fastened once the frame is unfolded to maintain the structure’s integrity.
- Attach the Wheels: Most Burley trailers have quick-release wheels that can be easily attached without tools. You’ll typically need to slide the wheel axle into the slot on the trailer’s frame and secure it with the provided locking mechanism. Ensure the wheels are securely attached and locked in place.
- Extend and Secure the Tow Bar: The tow bar (or hitch arm) is what connects the trailer to your bike. Extend the tow bar from its folded position and lock it into place. Ensure it’s securely attached to the trailer frame.
- Attach the Safety Flag: For visibility, attach the safety flag to the designated slot on your trailer. This is important for safety, especially when riding in traffic or crowded areas.
- Connect the Trailer to Your Bike: Follow the specific instructions for your Burley trailer model to attach the tow bar to your bike. This usually involves attaching a hitch to your bike’s rear axle or frame and then connecting the tow bar to this hitch. Ensure all connections are secure and that the trailer is correctly aligned with your bike.
- Install the Cover and Canopy (if applicable): If your trailer model comes with a cover or canopy, attach it according to the manufacturer’s instructions. Ensure that it’s secured properly to protect passengers or cargo from weather elements.
- Check Stability and Security: Before using the trailer, give it a gentle shake to ensure everything is stable and securely attached. Check all latches, locks, and connections to ensure they are tight and secure.
- Review Safety Guidelines: Finally, review the safety guidelines provided by Burley. This includes checking for any recommended weight limits, ensuring passengers wear helmets if the trailer is being used to carry children, and understanding how the trailer’s presence affects your bike’s handling.
Can You Attach a Burley Bike Trailer to an Electric Bike?
It is not only conceivable but also a sensible option for people wishing to increase the usefulness of their electric bike (e-bike) to attach a Burley bike trailer to it. You can use it for towing your kids, carrying groceries, or for both purposes.
Tips For Quick And Secure Attachment Of The Burley Bee Bike Trailer
Safety Measures And Precautions
Attaching the Burley Bee Bike Trailer to your bike doesn’t have to be complicated or time-consuming. With the following quick tips, you’ll have the trailer securely attached and be prepared for a smooth and enjoyable ride with your little ones or cargo in tow. Let’s dive into the specifics to ensure your trailer is connected safely and correctly.
Proper Alignment And Positioning
Proper alignment is crucial when attaching the Burley Bee Bike Trailer. Start by positioning the trailer’s tow bar so it’s parallel with the bicycle frame. This ensures a balanced distribution of weight and helps maintain stability while cycling.
- Attach the hitch: Affix the hitch to your bike’s rear axle or frame.
- Ensure flexibility: Verify the hitch connector has enough room to pivot – this provides the necessary flexibility while turning.
Aligning the trailer correctly prevents undue stress on the connection points and contributes to a safer ride.
Checking For Secure Attachment
A secure attachment is critical for the safety of your ride. After hooking up the tow bar and hitch, conduct a thorough check to make sure everything is locked into place.
- Inspect the hitch connection: Ensure the pin or quick-release mechanism is locked and the safety strap is wrapped around the bike frame.
- Double-check the tow bar: Make sure it is securely connected to the hitch and there is no excessive play or movement.
- Verify the safety flag: Confirm the safety flag is present and visible for increased visibility on the road.
After these checks, give a gentle tug to the trailer to confirm that all connections are tight and secure.
Testing The Trailer For Smooth Movement
Before you embark on your journey, it’s imperative to test the trailer’s movement. This step ensures the connection is not only secure but also allows for smooth movement of the trailer behind the bike.
- Perform a test ride: Take a short spin to observe the trailer’s performance. It should follow the bike naturally without any jerking movements.
- Listen for noises: Pay attention to any unusual sounds that may indicate loose parts or complications.
- Inspect wheel motion: Confirm the wheels are spinning freely and the trailer is tracking straight.
A successful test ride gives the green light for longer adventures, with the assurance that your trailer is attached appropriately and will provide a smooth, safe ride.
Ensuring your family’s safety is paramount when it comes to outdoor activities. Attaching a Burley Bee bike trailer requires meticulous attention to detail to ensure safe and enjoyable rides. Let’s delve into the essential safety measures and precautions you should take while riding with a Burley Bee bike trailer. We’ll cover everything from the safety guidelines for the ride to the maintenance of the attaching mechanism and the correct storage practices.
Safety Guidelines For Riding With The Burley Bee Bike Trailer
Riding with a bike trailer introduces a new set of dynamics to the cycling experience. Abiding by these safety guidelines ensures that both you and your little passenger enjoy a secure journey:
- Check the hitch connection before each ride to ensure the trailer is securely attached.
- Always use the safety strap as an additional precaution in case the primary hitch fails.
- Equipping your bike and trailer with the necessary lights and reflectors, especially for low-light conditions, is vital for visibility.
- Ensure the passenger is wearing a helmet and is strapped in the trailer’s harness comfortably.
- Practice riding with the trailer in a safe area to get used to the weight and length before heading out on busy routes.
Maintaining The Attaching Mechanism
- Inspect the hitch regularly for signs of wear and tear.
- Follow the manufacturer’s instructions for any maintenance or replacements.
- Keep the coupling area clean from dirt and debris that could compromise the connection.
- Lubricate moving parts periodically to ensure smooth operation.
Staying diligent with maintenance is crucial for the long-term reliability of your bike trailer attachment system.
Storing The Bike Trailer Properly
Proper storage not only prolongs the life of your Burley Bee but also ensures it’s ready and safe for your next adventure. Consider these best practices:
- Clean the trailer after use to prevent rust and fabric degradation.
- Store in a dry, covered space to protect against the elements.
- Avoid leaving the trailer in direct sunlight for extended periods, which can weaken the fabric and fade colors.
- Hang or elevate the trailer to prevent tires from flat spots or damage.
Taking these simple steps can keep your Burley Bee bike trailer in top-notch condition, ready for countless memories on the road.
Frequently Asked Questions Of How To Attach Burley Bee Bike Trailer
Is The Burley Bee Trailer Compatible With My Bike?
The Burley Bee Trailer is designed with a versatile hitch that fits most bicycles. However, for non-standard bikes like certain e-bikes or those with unique rear axles, an adapter may be required. Always confirm compatibility before purchasing.
What Tools Are Needed To Attach The Burley Bee?
No special tools are needed for installation. The Burley Bee attaches using a hitch that fastens to your bike’s rear axle. It typically includes all necessary components for standard bikes right out of the box.
Can I Install The Burley Bee Myself?
Yes, the Burley Bee Bike Trailer is designed for easy, user-friendly attachment. The process is straightforward and usually involves connecting the hitch to your bike’s rear axle and securing the safety strap.
How Do I Secure My Child In The Burley Bee?
The Burley Bee has a secure five-point harness system. To secure your child, place them in the seat, buckle the harness, and adjust the straps to fit snugly yet comfortably around your child.
Conclusion
Attaching a Burley Bee bike trailer is a breeze once you know the steps. With this guide, you’ve gained the know-how to manage installation confidently. Remember, safety is paramount, so double-check connections before each ride. Enjoy the added freedom and adventure your trailer brings to cycling outings!

Steven is a professional cyclist and his passion is cycling. He has been cycling for the last 6 years and he loves using bikes while outing as well. Based on his experiences with the different types of bikes; he is sharing his opinions about various bikes so that a beginner can start right away. Find him on Twitter @thecyclistguy Happy Biking.
Leave a Reply