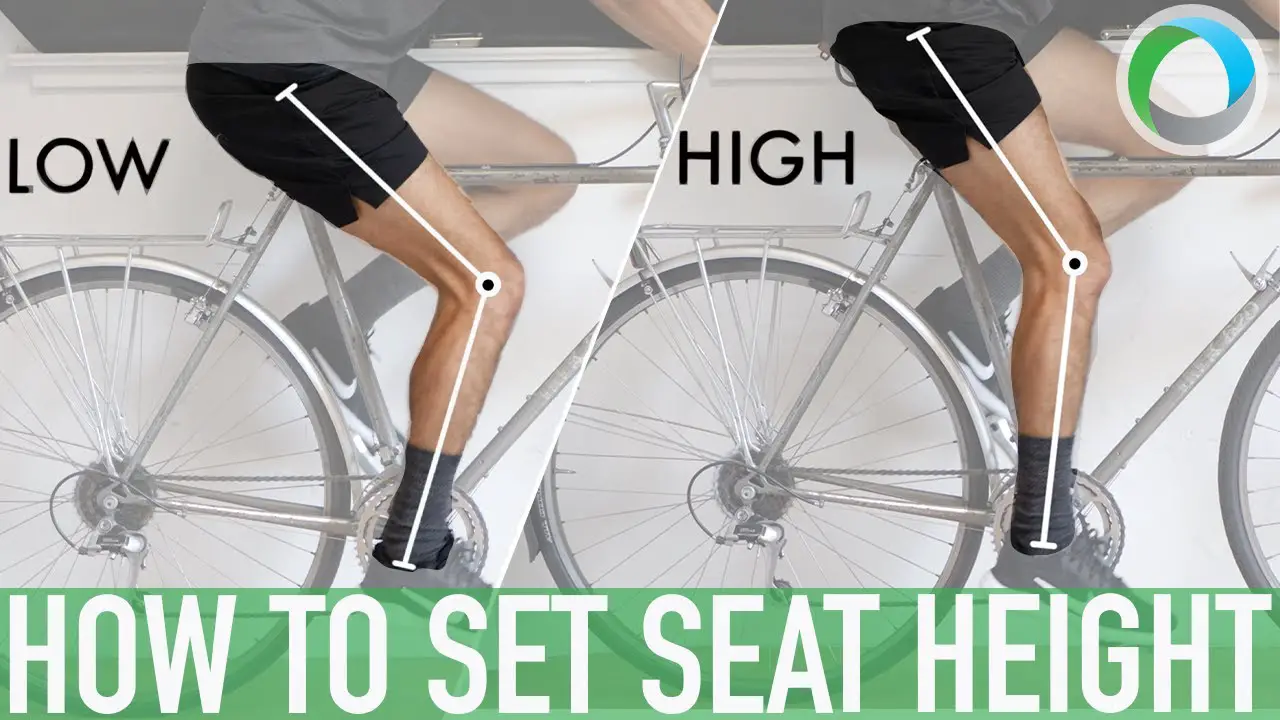
To set your bicycle seat height, measure your inseam and adjust the seat post to match it. Ensure the height allows a slight bend in your knee at the pedal’s lowest point.
Setting the correct bicycle seat height is crucial for a comfortable ride and efficient pedaling. It can prevent injuries and enhance your overall cycling performance.
Proper seat height optimizes leg extension, allowing for better power transfer and a smoother cycling experience.
It’s a simple yet essential step every cyclist should master. Tailoring the seat to your body’s proportions can make a significant difference in your biking enjoyment and endurance.
Before hitting the road or trail, take a moment to fine-tune your saddle position for the best possible ride.
Introduction To Ideal Bike Fit
Getting the right bike fit is crucial. It ensures a comfortable ride and top performance. The seat height plays a major role in this.
A seat that’s too high or too low can lead to discomfort and injuries. This guide helps you set the perfect bicycle seat height.
The Importance Of Proper Seat Height
The right seat height optimizes pedaling efficiency and power. It also reduces strain on knees and hips. A correct seat position prevents injuries and increases comfort during long rides.
Impact On Comfort And Performance
A well-set seat height boosts endurance and speed. It allows for a full leg extension. This means less fatigue and better muscle engagement. An ideal seat height can make a significant difference in your cycling experience.
Credit: www.cyclingweekly.com
Essential Tools For Seat Adjustment
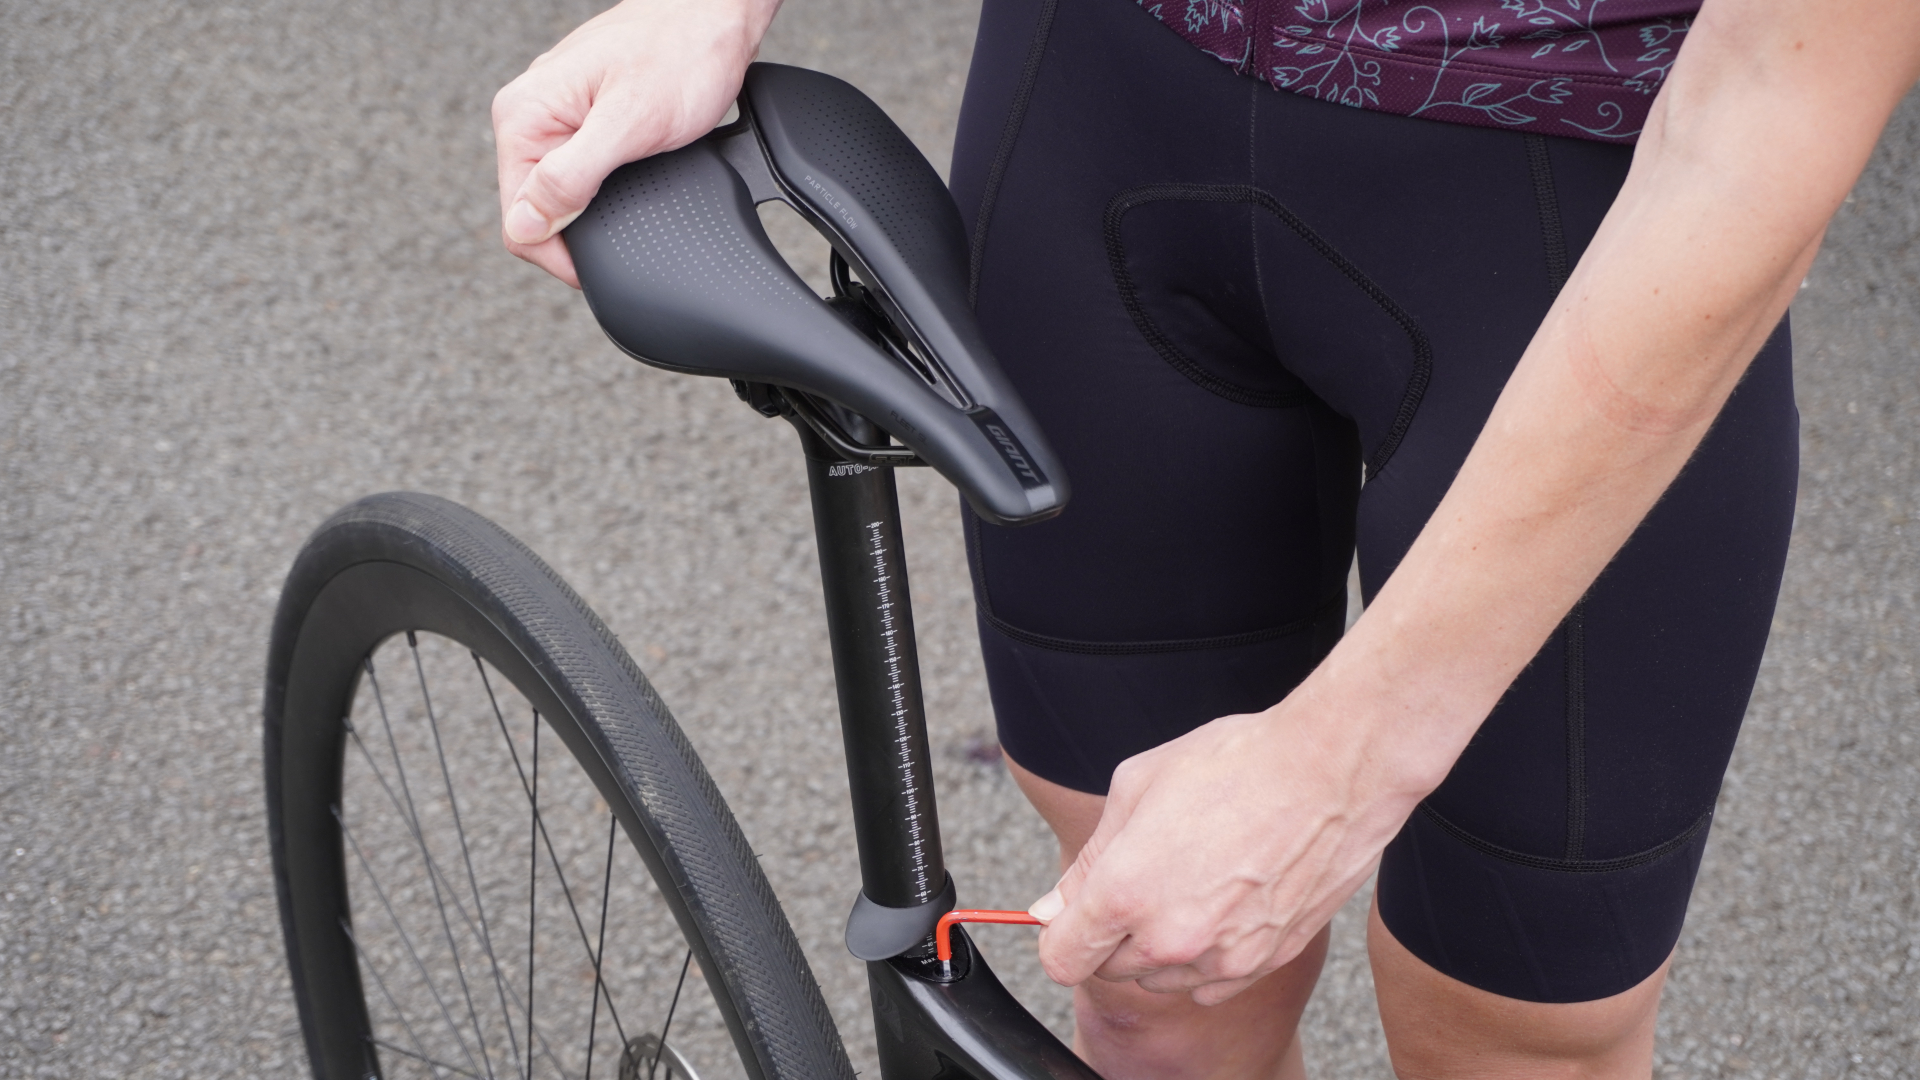
Setting the right seat height on your bicycle is key for a comfortable ride. You need certain tools for this job. Let’s look at the essential tools for seat adjustment.
Types Of Wrenches Needed
To adjust your seat height, different bikes need different wrenches. Here are the main types:
- Allen Wrenches: Most bikes use these. Sizes vary.
- Adjustable Wrench: Good for older bikes. It fits many sizes.
- Torque Wrench: Best for precise adjustments. It protects your bike from damage.
Using A Bike Stand For Stability
A bike stand holds your bike steady. This makes the job easier and safer. Here’s why you should use one:
- It keeps the bike upright. You can focus on adjusting the seat.
- It makes reaching the seat bolts easy. No need to bend over.
- It helps you check the seat height accurately. You can sit on the bike and make sure it’s right.
With these tools, adjusting your bike seat is simple. Make sure you have the right wrench and consider using a bike stand. Your rides will be more enjoyable with the seat set just right.
Anatomy Of A Bicycle Seat
Understanding the anatomy of a bicycle seat is key to a comfortable ride. A well-positioned saddle can transform your cycling experience. It supports your body, maintains balance, and ensures efficiency. Let’s explore the components and adjustments necessary for the ideal seat height.
Seatpost Mechanics
The seatpost connects the saddle to the bike frame. It allows vertical movement for height adjustment. Seatposts come in various diameters and lengths. Correct sizing is crucial for a secure fit.
- Materials vary from aluminum to carbon fiber.
- Clamps at the top secure the saddle.
- Quick-release levers enable easy height changes.
Ensure the seatpost matches the bike frame’s specifications. Tighten the clamp to avoid slipping while riding.
Saddle Adjustments
The saddle’s position affects comfort and power. Adjustments include tilt, height, and fore/aft position. Correct alignment prevents strain and improves pedaling.
- Loosen the bolts under the saddle.
- Adjust for a level or slight nose-down tilt.
- Set the height to allow a slight knee bend.
- Slide the saddle forward or backward.
Use a wrench to make these adjustments. Tighten bolts to the manufacturer’s specifications. Test ride to confirm the comfort level.
| Adjustment | Tool Required | Purpose |
|---|---|---|
| Height | Hex key or wrench | Leg extension and comfort |
| Tilt | Hex key or wrench | Pelvic positioning |
| Fore/Aft | Hex key or wrench | Balance and reach |
Remember, a well-adjusted saddle can make a huge difference. Take time to get it right!
Measuring Your Inseam For Seat Height
Setting the right bicycle seat height is crucial for comfort and efficiency. Your inseam measurement provides a solid starting point. This guide ensures you get it right.
Step-by-step Guide To Measuring
Correct inseam measurement leads to optimal seat height. Follow these steps:
- Stand barefoot with your back against a wall.
- Place a book between your legs, spine up.
- Make sure it’s level and firmly against your crotch.
- Mark the top of the book on the wall with a pencil.
- Measure from the floor to the mark. That’s your inseam.
Common Mistakes To Avoid
Avoid these errors for an accurate inseam measurement:
- Wearing shoes: Adds unnecessary height.
- Not leveling the book: Skews measurement.
- Measuring alone: Get help for precision.
- Using soft tape: A rigid measure is more accurate.
Remember, proper seat height boosts performance and prevents injuries. Take your time with the process.
The Heel-to-pedal Method
Setting the right seat height on a bicycle ensures a comfortable ride. The Heel-to-Pedal Method is a popular, easy technique for this.
It helps riders find the perfect seat height without needing expert help.
Procedure For Setting Seat Height
Follow these steps to set your bicycle seat height using the Heel-to-Pedal Method:
- Wear your cycling shoes and mount your bike. Make sure it’s stable.
- Place your heel on the pedal. Move the pedal to the lowest point.
- Your knee should be straight when your heel is on the pedal.
- If your knee is bent, raise the seat. If your hip rocks, lower the seat.
- Repeat until your knee is straight with your heel on the pedal.
Fine-tuning For Comfort
After setting the seat height, fine-tuning is key for the best ride:
- Test ride: Take a short ride to see how it feels.
- Adjust: If needed, adjust the seat slightly up or down.
- Check alignment: Ensure your knee is over the pedal axle.
- Listen to your body: Comfort is crucial. Adjust as needed.
Remember, small adjustments make big differences in comfort and efficiency.
Credit: rehook.bike
The 109% Method Explained
Setting the correct bicycle seat height is crucial for comfort and efficiency. One popular approach is the 109% method. This method helps riders find an ideal position to maximize power and minimize injury.
Calculating Seat Height Using Leg Length
Begin by measuring your inseam. This is the length from your crotch to the ground. Stand straight with your back against a wall. Place a book between your legs. Mark the top edge on the wall. Measure this height.
Next, multiply your inseam by 1.09. This gives you the seat height from the bottom bracket’s center to the saddle’s top.
Use a tape measure for precision. Align the top of the saddle with this measurement.
Advantages Of The 109% Method
- Precision: Provides a specific starting point for seat height.
- Custom Fit: Tailors the bike to your body’s measurements.
- Reduced Strain: Helps prevent knee and lower back pain.
- Increased Power: Optimizes leg extension for better pedal strokes.
Remember, fine adjustments may be necessary. Check your comfort and performance on a ride. Adjust in small increments as needed.
The 109% method gives a reliable starting point for a great cycling experience.
Adjusting Seat Angle And Position
Adjusting the seat angle and position is crucial for a comfortable ride. A poorly adjusted saddle can lead to discomfort and even injury. Follow these guidelines to ensure your saddle supports you just right.
Optimal Saddle Tilt
The tilt of your saddle affects your comfort and efficiency. A level saddle often works best. Use a spirit level to check the tilt. Aim for a neutral position where your hips do not slide forward. Make small adjustments to find your sweet spot.
Horizontal Seat Adjustment
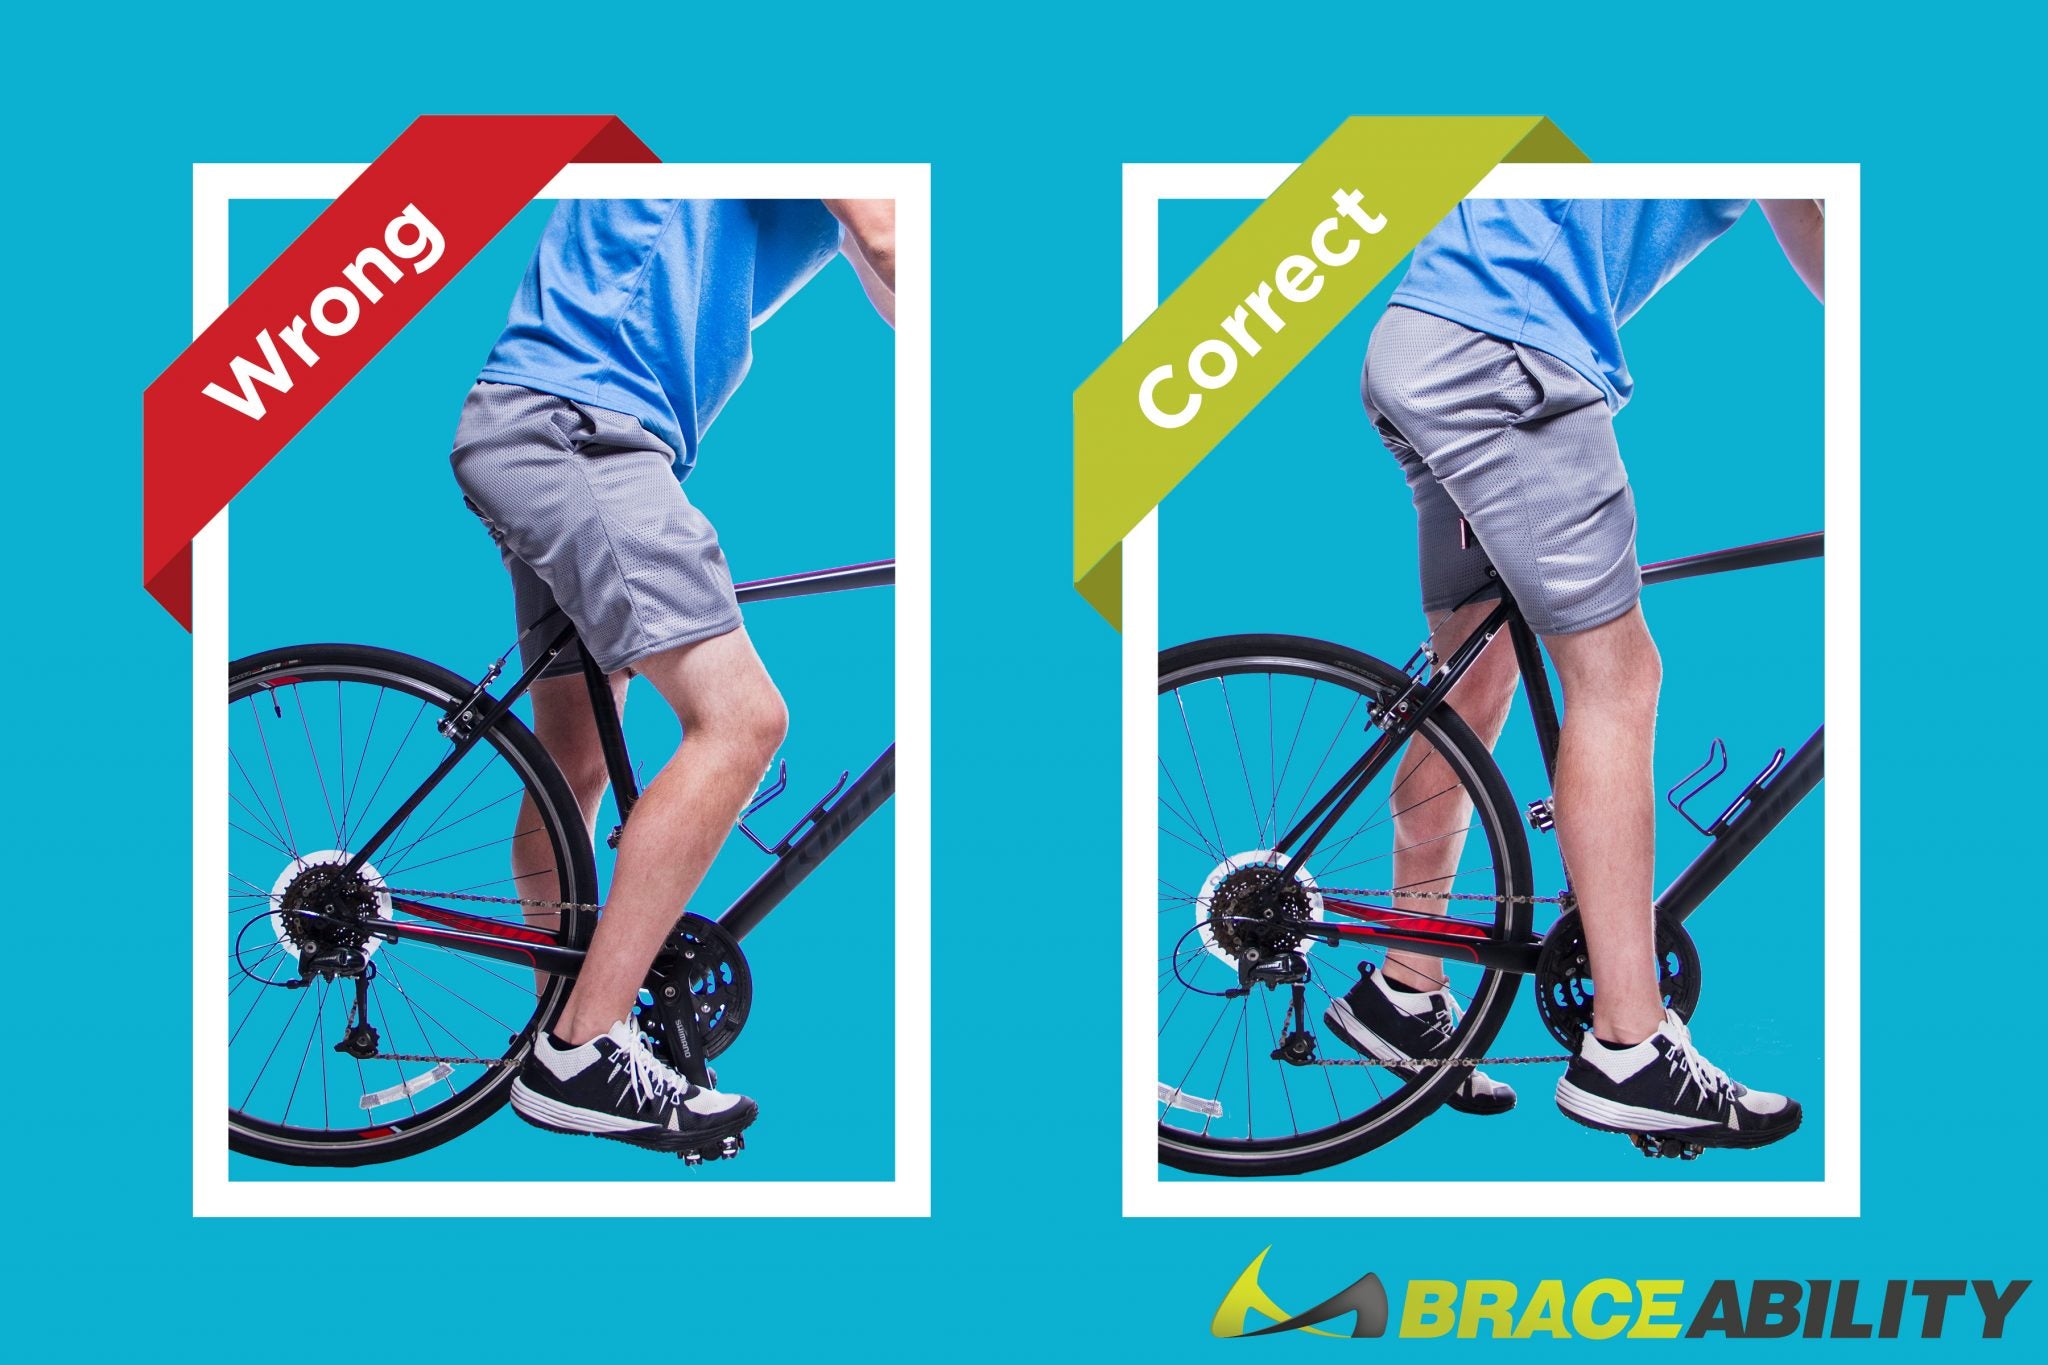
The right horizontal position aligns your knees over your feet. Sit on the bike and place your heel on the pedal.
Your leg should be straight when the pedal is at its lowest point. Adjust the seat forward or back to achieve this position.
Bold your pedal stroke to reduce strain on your knees. Use a plumb line from your knee to check alignment. It should pass through the pedal axle for the best horizontal seat position.
| Step | Action |
|---|---|
| 1 | Loosen the saddle clamp |
| 2 | Adjust saddle tilt |
| 3 | Tighten the clamp |
| 4 | Check alignment with a plumb line |
| 5 | Test ride and readjust if necessary |
Credit: www.braceability.com
Safety Checks Post-adjustment
After adjusting your bicycle seat height, safety checks are vital. These ensure that your bike is secure and safe to ride.
Two important post-adjustment checks are seatpost security and overall bike safety.
Ensuring Seatpost Security
Once you’ve set the seat height, securing the seatpost is crucial. Follow these steps:
- Check the clamp: Ensure the seatpost clamp is tight.
- Test for movement: Try to move the seat. It shouldn’t budge.
- Respect torque specs: Use a torque wrench. Tighten to the manufacturer’s specifications.
These steps prevent the seat from slipping. They protect you from unexpected seat movement.
Verifying Overall Bike Safety
After securing the seatpost, assess your bike’s safety. Look at the following:
| Component | Check |
|---|---|
| Brakes | Ensure brakes respond promptly. |
| Tires | Check for proper inflation and tread. |
| Handlebars | Make sure they are secure and aligned. |
| Chain | Look for proper tension and lubrication. |
These checks help avoid accidents. They maintain your bike’s performance.
Test Riding And Fine-tuning
After setting your bicycle seat height, a test ride is essential. This ride helps you feel the bike’s fit. You’ll know if you need further adjustments. Let’s fine-tune your bike fit for ultimate comfort and performance.
Assessing Comfort During A Ride
Comfort on your bike is crucial. Start with a short ride. Focus on how your legs and hips feel. Your knees should have a slight bend at the bottom of each pedal stroke.
Discomfort means adjustments are necessary. Note any discomfort in your seat, knees, or back.
Making Incremental Adjustments
Minor changes can make big differences. Use a hex key for seat adjustments. Make changes in small increments. Adjust, then ride again.
Repeat this until you find the perfect seat height. Document each change. This makes it easy to remember your ideal settings.
- Start with 2-3mm changes
- Ride for at least 5-10 minutes after each adjustment
- Keep track of your seat height changes
Maintaining Your Bike Seat Position
Maintaining the right position of your bike seat is crucial.
It ensures a comfortable ride and prevents injuries. Let’s dive into how you can keep your bike seat at its best.
Regular Check-ups
Checking your bike seat regularly is a must. This simple action can make a huge difference. Here’s why:
- Comfort: A well-positioned seat offers a more comfortable ride.
- Safety: It also means a safer journey, with less chance of accidents.
- Bike Health: Regular checks keep your bike in top shape.
Make it a habit to inspect your seat before each ride. Look for any signs of looseness or wear. Tighten any loose bolts. Replace the seat if it shows major wear.
When To Re-adjust
Knowing when to re-adjust your bike seat is key. Here are a few signs:
- Discomfort: If riding becomes uncomfortable, check your seat position.
- New Shoes or Pedals: These changes can affect your seat height.
- After a Fall: Always check your seat alignment if you’ve had a fall.
Re-adjusting your seat is simple. First, loosen the bolt under the seat. Then, raise or lower the seat to the right height. Finally, tighten the bolt securely.
Troubleshooting Common Seat Height Issues
Setting the right bicycle seat height is key to a comfortable ride. Yet, cyclists often face seat height issues. Let’s troubleshoot these problems together.
Dealing With Slipping Seatposts
A slipping seatpost can be annoying and affect your ride. Here are steps to fix it:
- Check the clamp: Ensure it’s tight and secure.
- Inspect for damage: Look for signs of wear or cracks.
- Use carbon grip paste: Apply to carbon frames and seatposts.
- Consider a shim: A shim can provide a better fit for the seatpost.
Addressing Discomfort
If you feel discomfort, your seat height may need adjustment. Follow these tips:
- Measure your inseam: Use this as a guide for seat height.
- Heel on pedal method: Adjust until your leg is fully extended.
- Test and adjust: Ride and tweak the height as needed.
Remember, a well-adjusted seat supports a better ride and reduces injury risk.
Conclusion: Embracing The Perfect Ride
Setting your bicycle seat to the ideal height transforms cycling. It boosts comfort and power. A well-adjusted seat lets you ride longer without pain.
This guide helps you find that sweet spot.
The Benefits Of A Well-set Seat
Correct seat height is crucial for an enjoyable ride. Let’s explore these benefits:
- Enhanced leg power: Optimal leg extension boosts pedaling force.
- Reduced fatigue: Proper seat height prevents quick tiring.
- Prevents injuries: Right height keeps knees and joints safe.
- Better control: A well-set seat improves bike handling.
Encouragement For Continuous Adjustment
Don’t set your seat once and forget it. Your body changes, and so should your seat height. Check it regularly. Make small tweaks for the best fit.
Listen to your body after each ride. Does something feel off? Adjust again. Find your perfect ride, then keep it perfect.
- Notice changes: Feel for signs of discomfort or less power.
- Adjust often: Make small seat height changes as needed.
- Seek perfection: Aim for the most comfortable ride every time.
Embrace these tips. Enjoy every journey on your bike. The right seat height makes all the difference.
Frequently Asked Questions
What Is The Correct Height For A Bicycle Seat?
The correct height for a bicycle seat allows your leg to be almost fully extended, with a slight bend, at the bottom pedal stroke. Measure by ensuring your heel can touch the pedal at its lowest point comfortably. Adjust the seat as needed for optimal comfort and efficiency while riding.
How Do I Adjust My Bike For My Height?
To adjust your bike for your height, start by setting the saddle to hip level when standing next to it. Ensure the handlebars are comfortably reachable and adjust the seat forward or backward so your knee slightly bends at the pedal’s lowest point.
Always test ride for comfort.
What Is The Formula For Setting Saddle Height?
The formula for setting saddle height is to multiply your inseam length by 0. 883. Adjust the saddle to this height, measured from the center of the bottom bracket to the top of the saddle.
How High Should The Seat Be On A Bike Machine?
Adjust the bike machine seat to hip height, ensuring a slight bend in the knee when pedaling at the lowest position.
What’s The Ideal Bicycle Seat Height?
The ideal bicycle seat height allows for a slight bend in the knee at the pedal’s lowest point, ensuring efficient pedaling and comfort.
Conclusion
Adjusting your bicycle seat height is crucial for a comfortable ride and optimal performance. By following the steps outlined, you’ll ensure your cycling experience is both enjoyable and efficient.
Remember, small tweaks can lead to significant improvements. So, take the time to get it right and enjoy the journey ahead.
Happy cycling!

Steven is a professional cyclist and his passion is cycling. He has been cycling for the last 6 years and he loves using bikes while outing as well. Based on his experiences with the different types of bikes; he is sharing his opinions about various bikes so that a beginner can start right away. Find him on Twitter @thecyclistguy Happy Biking.

Leave a Reply