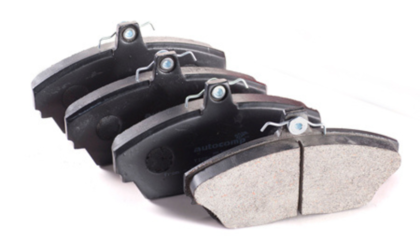
How To Remove Brake Pads: Quick & Easy Guide? To remove brake pads, first, lift the vehicle and remove the wheel, then unbolt the caliper and slide out the pads. Ensure the car is secure on a jack stand before starting.
Replacing brake pads is an essential maintenance task that ensures your vehicle’s braking system functions effectively. As brake pads wear down from constant friction, their ability to stop the car diminishes, posing a safety risk.
It typically involves lifting the car, removing the tire for access, and dealing with the brake caliper and old pads.
This process can save money on professional services and is manageable for someone with basic mechanical skills and tools.
It’s critical to have a clear understanding of your vehicle’s braking system and to consult the manufacturer’s guidelines before attempting this task.
Start with the right tools and safety equipment to ensure a successful and safe brake pad replacement.

Credit: www.youtube.com
Safety First: Preparing To Change Brake Pads
Changing brake pads is crucial for vehicle safety. Take necessary precautions. Ensure a safe, efficient brake pad change.
Gather Your Tools
Start with the right tools. A smooth process needs these:
- Jack and jack stands to lift and support the car
- Wheel wrench to remove the tire
- C-clamp or brake caliper tool to retract the caliper piston
- Brake pad spreader or flat tool for separation
- Ratchet and socket set for various nuts and bolts
- Brake cleaner to clean the assembly
- New brake pads for replacement
Each tool is pivotal. Confirm their presence before starting.
Secure The Vehicle
Securing your car prevents movement and potential danger. Follow these steps:
- Use a solid, flat surface for stability.
- Engage the parking brake tightly.
- Place wheel chocks around the opposite tires.
- Loosen the lug nuts slightly before lifting the car.
- With the jack, raise the vehicle.
- Set jack stands for extra safety.
Remember, never rely on a jack alone. Always use jack stands to ensure your car is secure.
Identifying Worn Brake Pads
Your vehicle’s safety depends on functioning brakes. It’s critical to recognize when brake pads need replacing. This section walks you through spotting worn-out brake pads.
Visual Inspection
Checking brake pads visually is a sure way to assess their state. Look through the wheel spokes. Brake pads press against the brake disc.
Less than a quarter-inch pad thickness suggests a change is due. Use a flashlight for clarity. Wear indicators, metal tabs on pads, also signal replacement when touching the disc.
Warning Signs
Be alert to these signals:
- High-pitched squeal: Often an in-built warning sign.
- Grinding noise: Likely metal-on-metal contact.
- Reduced responsiveness: Brake pedal feels spongy or presses farther.
- Pulsating pedal: Occurs when braking at highway speeds.
- Vehicle pulling: Car veers to one side during braking.
Address these signs promptly to maintain optimal brake performance.
Wheel Removal For Access
Before diving into the heart of brake pad replacement, wheel removal is a critical first step. This section guides you through loosening lug nuts and lifting the car safely.
Proper wheel removal grants you access to the brake components, allowing a smooth transition to servicing your brakes.
Loosening Lug Nuts
Always start with the lug nuts before lifting your car. This ensures safety and makes loosening easier. Here’s how to do it:
- Park on a flat surface and apply the parking brake.
- Grab your lug wrench and fit it onto the first lug nut.
- Turn the wrench counter-clockwise.
- Do not remove the nuts completely yet.
- Loosen each lug nut half a turn to break the seal.
Lifting The Car
Raising your vehicle properly is crucial for safe brake pad removal. Follow this step-by-step process:
- Position the jack under the car’s designated lift point.
- Ensure the jack is stable on solid ground.
- Pump the jack handle to lift the car.
- Settle the car securely onto jack stands.
- Only then remove all lug nuts and take off the wheel.

Credit: auto.timesofindia.com
Is it hard to remove brake pads?
Tackling brake pads might seem daunting at first glance, yet it’s a task that, with the right tools and a bit of patience, can actually be quite manageable. The complexity of the job can vary widely depending on the vehicle’s make and model.
Some cars have been designed with ease of maintenance in mind, allowing for the brake pads to be changed with minimal fuss. However, others might require a more intricate approach, involving the removal of multiple components just to access the brake pads.
The first step is always to ensure you have the correct equipment. You’ll need a few basic tools, such as a jack to lift the car, a lug wrench to remove the wheels, and the appropriate tools to open the caliper housing.
Sometimes, special tools may be needed to retract the caliper piston—a step necessary to fit the new pads in place.
One commonly encountered hurdle is the caliper piston itself. It needs to be compressed back into its housing to make room for the new, thicker pads.
Depending on the vehicle, this can be straightforward or require specific techniques and tools. Another potential challenge is rusted or seized components, which are more common in older vehicles or those exposed to harsh climates.
The process involves removing the wheel, unfastening the caliper, and then removing the old pads.
After cleaning the area and possibly compressing the caliper piston, the new pads can be installed, followed by reassembling everything back together.
It’s always advised to review the vehicle’s manual or a reliable guide specific to your model before starting.
So, while the task can be straightforward with the right preparation and some mechanical inclination, it can also present challenges that might make it advisable for some to seek professional help.
Always prioritize safety, and don’t hesitate to consult a professional if the task seems beyond your comfort level.
Navigating The Caliper Assembly
Welcome to the heart of brake maintenance: the caliper assembly. This is where the magic of stopping your car happens.
Correctly navigating this mechanism is crucial for safe brake pad replacement. Let’s guide you through with simple steps and important tips to ensure a smooth process.
Caliper Retraction
First things first: you need to retract the caliper. This creates space for new pads. Here’s how:
- Locate the caliper bolts on the backside of the caliper.
- Use a ratchet to loosen and remove these bolts.
- Gently slide the caliper off the rotor.
- Support the caliper with a hanger. Prevent strain on the brake hose.
- Compress the caliper piston with a C-clamp or tool. Make room for new brake pads.
Brake Pad Removal
With the caliper piston retracted, pad removal is next:
- Remove retaining clips that hold the pads. This might require pliers.
- Slide out the old pads. They may be snug, so a gentle tap helps.
- Inspect the pads for uneven wear. Check braking performance .
- Once removed, compare old with new pads. Verify they’re the correct size.
Installing New Brake Pads
New brake pads ensure your vehicle stops safely and effectively. Fitting new pads may seem daunting, but follow these steps to get it right.
Cleaning And Preparation
Before installing the brake pads, make certain the area is clean. Dirt or debris could cause noise or braking issues later.
Use brake cleaner and a wire brush to clean the caliper and the surrounding area. Inspect the caliper for damage. Make sure the caliper piston is compressed fully into the housing. This makes room for the new, thicker pads.
- Spray brake cleaner on the caliper mount and rotor.
- Use a wire brush to remove rust and debris.
- Ensure the caliper piston is fully retracted.
- Check the brake fluid level after compressing the piston.
Inserting New Pads
Now, it’s time to install the brake pads. Take the new pads and apply anti-squeal compound on the back, avoiding the friction material.
Wait for the compound to become tacky. Slide the pads into place. They should fit snugly against the rotor. Re-install the caliper over the new pads carefully.
Don’t force the caliper; it should slide over the pads with a little pressure. Fasten the caliper bolts securely.
- Apply anti-squeal compound to the pads’ back.
- Place pads against the rotor snugly.
- Slide the caliper over the pads gently.
- Tighten the caliper bolts properly.
Final Steps And Precautions
Once you’ve changed your brake pads, finishing right is crucial. This means reassembling everything carefully and ensuring your safety on the road.
Pay close attention to these steps to complete your DIY brake pad replacement project successfully.
Reassembling The Wheel
- Place the wheel back onto the wheel hub.
- Hand-tighten the lug nuts in a star pattern.
- Lower the car from the jack stands using a jack.
- Tighten the lug nuts with a torque wrench to the manufacturer’s specifications.
Safety Checks And Testing
Before hitting the road, safety checks are vital. These are the steps to ensure your vehicle is ready to drive:
- Check the brake fluid level.
- Pump the brake pedal to restore brake pressure.
- Inspect for leaks in the brake system.
- Start the engine and check the brake pressure again.
- Take a slow test drive to ensure the brakes function correctly.
Remember, never rush the final checks. Ensuring every component is secure and working can protect you and others on the road.

Credit: www.amazon.com
Frequently Asked Questions For How To Remove Brake Pads
How Do You Remove Brake Pads Step By Step?
Park your vehicle and secure it with wheel chocks. Loosen the wheel lug nuts, elevate the car, and remove the wheel. Unbolt the caliper and pivot it away to access the brake pads. Slide out the old pads, and retract the caliper piston.
Insert new pads and reassemble.
Can You Remove Brake Pads By Hand?
No, typically you cannot remove brake pads by hand alone. You usually need tools like a wrench or a ratchet to safely release the caliper before you can remove the pads. Always ensure the car is securely lifted and stable.
Are Brake Pads Easy To Change Yourself?
Yes, with basic mechanical skills and the right tools, changing brake pads is manageable for many DIY enthusiasts. Always consult your vehicle’s manual and follow safety procedures.
Can You Remove Brake Pads Without Removing Caliper?
No, you cannot remove brake pads without first removing the caliper, as the brake pads are mounted within it.
What Tools Are Needed To Change Brake Pads?
To replace brake pads, you’ll need a lug wrench, C-clamp, Allen keys or a socket set, and a car jack.
How Often Should Brake Pads Be Replaced?
Brake pads typically require replacement every 50,000 miles, but this varies based on driving habits and vehicle type.
Can You Change Brake Pads Yourself?
Yes, changing brake pads is a doable task for a home mechanic with the right tools and safety precautions.
Conclusion
Replacing your brake pads is a critical maintenance task for safe driving. With the right tools and guidance, you can tackle this DIY project confidently.
Always prioritize safety and consult a professional if unsure. Remember, regular brake checks keep your journeys smooth and secure.
Drive safely!

Steven is a professional cyclist and his passion is cycling. He has been cycling for the last 6 years and he loves using bikes while outing as well. Based on his experiences with the different types of bikes; he is sharing his opinions about various bikes so that a beginner can start right away. Find him on Twitter @thecyclistguy Happy Biking.

