To change a bike tire, remove the wheel and deflate the tube. Fix a flat by patching or replacing the tube.
Riding a bike is a great way to stay fit and enjoy the outdoors. But a flat tire can quickly ruin your ride. Knowing how to change a bike tire and fix a flat is essential for every cyclist. It saves time and prevents unnecessary stress.
Always carry a basic repair kit, including tire levers, a spare tube, and a mini pump. Practice these steps at home to build confidence. This skill not only ensures a smoother ride but also enhances your overall biking experience. With a little practice, you’ll handle flats like a pro and keep your biking adventures uninterrupted.
Essential Tools And Materials
Tire levers help remove the tire from the wheel. Insert the lever under the tire’s edge. Pry the tire away from the rim. Repeat with a second lever if needed. This makes tire removal easy and quick.
A new inner tube ensures a reliable fix. Always carry a spare tube. Patch kits are useful for temporary fixes. They include patches and glue. Follow the instructions carefully. This can save your ride.
Pumps are essential for inflating the tire. Choose a pump that fits your valve type. CO2 inflators are quick and easy. They are small and portable. Always carry one on long rides.
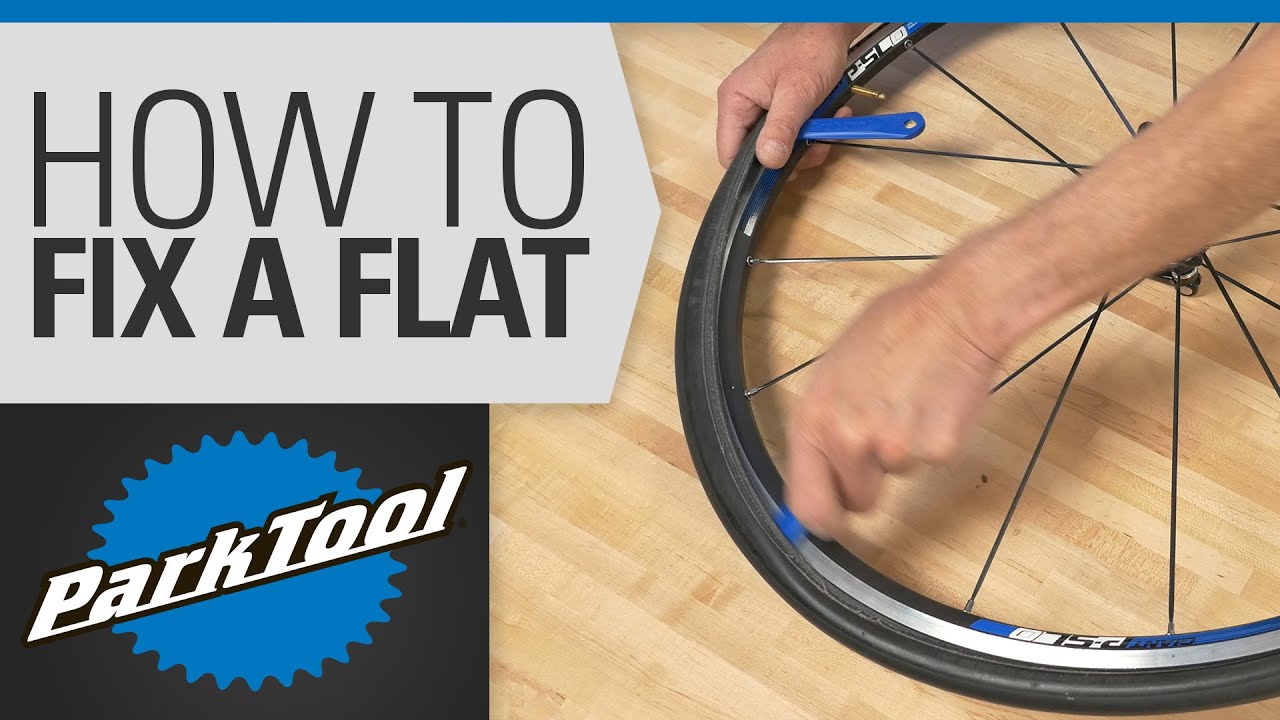
Credit: www.youtube.com
Preparation Steps
First, flip the bike upside down. Rest it on the seat and handlebars. This makes it easier to work. Ensure the bike is stable and won’t move. Use a bike stand if you have one.
A stable bike prevents accidents. Always work on a flat surface. This helps maintain balance. Keep your tools close by.
Release the brake if needed. Brakes can block the wheel. Use a wrench to loosen the nuts. Turn the nuts counterclockwise. Remove the wheel from the frame. You may need to lift the chain. Keep the nuts in a safe place. The wheel is now free to work on. Be careful with the chain.
Removing The Tire
Press the valve to release air. Ensure the tube is empty. This makes removal easier. Use a valve tool if needed. Keep pressing until no air is left.
Insert a tire lever under the bead. Pry the bead over the rim edge. Use a second lever for help. Slide the lever around the rim. This will unseat the bead completely.
Inspecting For Causes Of The Flat
Inspecting for causes of the flat reveals punctures, damaged valves, or worn-out tires. Identifying the issue helps ensure proper repair.
Check The Tire Tread
Look for sharp objects on the tire. Small stones can cause flats. Glass pieces can also puncture the tire. Remove any sharp objects you see. A clean tire is safe to use. Check the tire tread for wear signs.
Examine The Inner Tube
Take the tube out from the tire. Check for holes or tears. A small hole can cause a flat. Use water to find air bubbles. Mark the hole with a pen. Dry the tube before patching it. Make sure the tube is clean.
Patching Or Replacing The Inner Tube
Clean the area around the hole. Use sandpaper to roughen the surface. Apply glue to the hole. Wait a few minutes for it to dry. Place the patch on the glue. Press firmly for a few minutes. Ensure the patch sticks well. Remove the backing from the patch.
Put a little air in the new tube. Insert the tube into the tire. Make sure the tube is not twisted. Push the tire back onto the rim. Use your hands to seat the tire. Check the tube is not pinched. Inflate the tire to the correct pressure. Reinstall the wheel onto the bike.
Reattaching The Tire
Reattaching the tire involves aligning it properly with the frame, ensuring the axle fits securely in place. Tighten the bolts or quick-release mechanism to secure the tire firmly.
Seat One Bead First
Start by seating one bead of the tire. Push the bead into the rim. Use your fingers to work it around. Make sure the bead is even. Do not pinch the tube.
Adjust The Tube And Seat The Second Bead
Insert the tube into the tire. Start at the valve stem. Push the tube into the tire. Tuck it in gently. Do not twist the tube. Now, seat the second bead.
Use your fingers again. Work around the rim slowly. Check that the tube is not pinched. Make sure both beads are seated well.
Inflating The New Tube
Place the new tube inside the tire. Attach the pump to the valve. Pump air into the tube slowly. Watch the tube as it fills with air. Make sure it does not overinflate. If using a CO2 inflator, attach it to the valve. Release CO2 into the tube. Fill the tube to the right pressure. Remove the pump or inflator carefully.
Inspect the tire for proper seating. Spin the wheel and look closely. The tire should sit evenly on the rim. Adjust the tire if it looks uneven. Ensure no part of the tube is pinched. Double-check the entire tire. Ensure it is secure and even before riding.

Credit: www.bicycling.com
Post-repair Checks
Ensure your bike is safe by conducting post-repair checks. Verify tire pressure, inspect for damage, and test the brakes.
Spin The Wheel
Hold the bike frame steady. Give the repaired wheel a good spin. Watch for any wobbling or rubbing. Make sure it spins smoothly and straight. Check the brake pads. They should not touch the rim while spinning. Adjust if needed. Listen for any strange sounds. These can mean a problem.
Check The Tire Pressure
Use a tire pressure gauge. Check the pressure in the tire. Compare it to the recommended pressure on the tire sidewall. Pump air if the pressure is low. Release air if the pressure is too high. Make sure the valve is closed tightly. This prevents air from leaking out. Repeat the process for the other tire if needed.
Tips For Preventing Future Flats
Regularly check tire pressure and inspect for debris to prevent flats. Use puncture-resistant tires and carry a repair kit.
Regular Tire Maintenance
Check tire pressure every week. Keep it at the right level. Look for small cuts or stones. Remove any debris from the tire. Replace worn tires quickly. Clean your bike often. Make sure the tire is not dry or cracked.
Using Puncture-resistant Tires
Puncture-resistant tires can save time. They have extra layers. These layers stop sharp objects. They last longer than normal tires. Buy quality puncture-resistant tires. They cost more but protect better. Read reviews before buying them.
On-the-go Repairs
Learn how to change a bike tire and fix a flat quickly and efficiently with our simple step-by-step guide. Equip yourself with essential tools and tips for smooth on-the-go repairs, ensuring a hassle-free ride every time.
Portable Tools
Carry a mini pump. It helps inflate the tire quickly. A tire lever is useful for removing the tire. Bring a spare tube. It replaces the damaged one. A multi-tool can fix various parts. All these tools fit in a small bag.
Quick Fixes
Patch kits are small and handy. They can repair small punctures. Remove the tire using the tire lever. Take out the tube. Find the hole in the tube. Clean the area around the hole.
Apply the patch on the hole. Wait for it to dry. Put the tube back in the tire. Inflate the tire using the pump. Check for any leaks.
Troubleshooting Common Issues
First, check if the valve is open. Sometimes, it may be blocked. Try cleaning it gently. Ensure the pump is working properly. A broken pump will not inflate the tube. If the tube has a hole, it will not inflate. Replace it if there is a hole.
Examine the tire for sharp objects. Remove any glass, nails, or thorns. Check the rim for sharp edges. These can damage the tube. Ensure the tube is the right size. A wrong size tube can cause flats. Inspect the valve for leaks. Replace if it is damaged.
Wrapping Up And Next Steps
Old bike tubes should be disposed of responsibly. Many bike shops will recycle them. You can also check local recycling centers. They might accept rubber tubes. Never throw them in regular trash. This helps keep the environment clean.
If the tire keeps going flat, it might need more help. Visit a bike shop for complex issues. Professionals can ensure the tire is safe. They have the right tools and skills. This ensures you ride safely and smoothly.

Credit: www.rei.com
Frequently Asked Questions
Can I Use Fix-a-flat On A Bicycle Tire?
Fix-a-Flat is not recommended for bicycle tires. It’s designed for car tires only. Use bicycle-specific sealants instead.
How To Fix-a-flat Bike Tire On The Road?
To fix a flat bike tire on the road, remove the wheel, take out the tube, patch or replace it, and reassemble.
How To Fix A Punctured Tire On A Bike?
To fix a punctured bike tire, remove the wheel. Locate the puncture, patch the hole, and reassemble the wheel. Inflate the tire. Check for any leaks.
How Do You Fix-a-flat Bike Without A Patch Kit?
Remove the wheel and tire. Locate the puncture. Insert a piece of rubber or duct tape inside the tire. Reinflate the tire.
How Do You Remove A Bike Tire?
To remove a bike tire, deflate it completely, then use tire levers to pry the tire off the rim.
Conclusion
Changing a bike tire and fixing a flat is simpler than you think. Follow the steps provided, and you’ll be back on the road quickly. Regular maintenance can prevent future issues. Practice makes perfect, so don’t hesitate to get hands-on.
Enjoy your rides with confidence and safety.

Steven is a professional cyclist and his passion is cycling. He has been cycling for the last 6 years and he loves using bikes while outing as well. Based on his experiences with the different types of bikes; he is sharing his opinions about various bikes so that a beginner can start right away. Find him on Twitter @thecyclistguy Happy Biking.
Leave a Reply